
Every week, I get emailed by at least 3 – 5 different writers asking to write a guest blog on our Student-Tutor blog.
To be honest, I have no clue how they find my contact information.
Nowhere on my website do I state I allow guest blogging.
Still… every week, the emails come in.
If I don’t respond, they reply a couple of days later, and then again, etc.
Why do so many individuals hit us up?
My guess is individuals want:
- Exposure to their business or organization.
- Backlinks to a site with a strong domain authority in the education industry.
- Ability to build their resume.
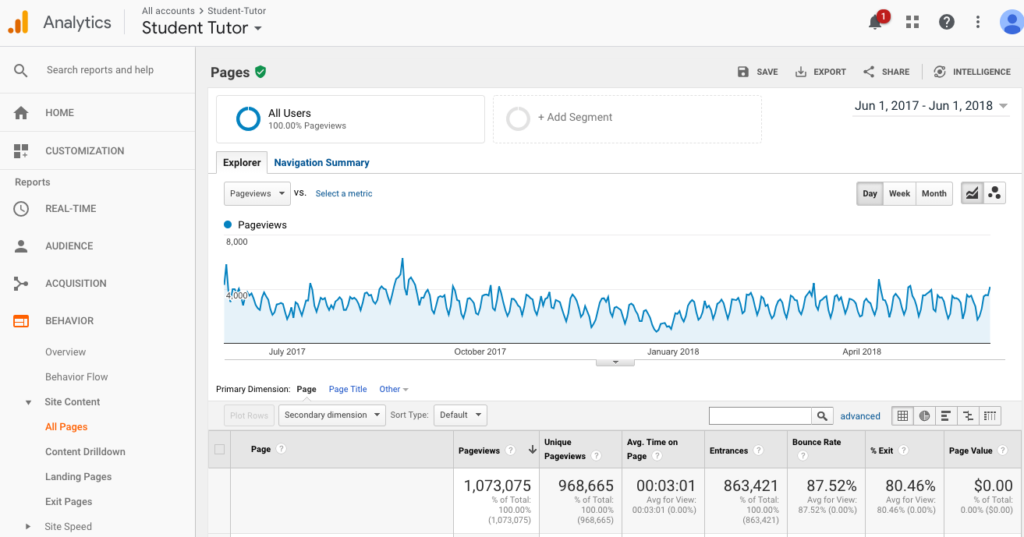
As you can see from the graph below last year, we got over 1 million page views, of which 863,421 were unique visitors.
Our blog continues to grow and connect with thousands of new people every month.
To help those who are looking to build their resume, exposure, backlinks, etc. we have decided to open up our platform to guest blogging.
In addition, every new article will be blasted out to our 25,000+ person email list!
What’s the catch? Why are you not charging for this? Well…
We plan on charging for this service in the future. However, for a limited time, we are offering this service free of charge.
If you already applied and were accepted! Please complete the following 11-steps for the topic you were approved for.
11-Step Process to Contribute on The Student-Tutor Blog
Step 1: Focus On Your Topic / Keyword & Follow Tips We Provided!
If your article was approved, you should have received an email with you approved topic / keyword, recommended title, along with additional tips.
Your topic was approved because it was solving a problem for a Google targeted keyword.
For some of you, this may be a foreign concept, so let me explain.
Every second, 40,000 people search for someone on Google. These “words” that people type in are called “keywords.”
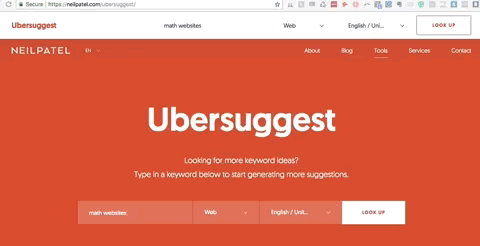
The amount of “keywords” that are searched for is free data available on websites like Google Keyword Planner and Uber Suggest.
By writing about a topic that is “searched” for often you will continue to get organic traffic from Google for years! Huge win for both of us! 
Luckily for you, you don’t have to worry about this! We already did the research for you!
It is your job to stay focused on the objective and make sure your blog article is focused on solving the problem associated with that particular keyword.
Later on, after you complete your article, you will go back and add the “keyword” or topic you are writing about more frequently.
This helps further remind Google what you are writing about.
Remember, Google is a robot, it needs help! 🙂
Step 2: Create a Good Outline & Title
Having a solid structure for your article is critical if you want your guest blog post to be published on the Student-Tutor blog.
We recommend you create a basic outline before you get started.
Here is our typical blog flow that we require. Ironically, the same outline flow of the blog article you are reading right now!
- Introduction: Get the users attention and introduce them to the topic you plan on talking about. Make sure to include the “keyword” you are targeted and focus on solving the “problem” associated with that keyword.
- Content: Provide value to the user around that particular keyword. Educate, inform, entertain, and demonstrate using content to solve their problem.
- Sub-Heading
- Content
- Sub-Heading
- Content
- Sub Heading
- Content
- Sub-Heading
- Summary: Wrap up what you talked about.
If you are still confused on what we look for in a good outline, please check out the following blog posts to get a better idea or just continue reading taking note of how this article is structured!
Step 3: Solve the User’s Problem
We are not here to spit out crap content.
We want to bring real value to our readers and help solve problems they are searching for online!
Therefore, before you submit your guest post to us make sure you have:
- Done a ton of research on the topic you are writing about. Who currently ranks for that topic on Google. What are they talking ahout? How can you expand to make your article better?
- Are doing 2- 4 of the following.
- Educate: Guide them to their solution. Provide step by step process for them to get the result they are looking for.
- Entertain: Get them to laugh. Make your writing entertaining!
- Demonstrate: If reviewing another product or service show them how this product or service solves the problem they are looking for.
- Inform: Help them understand what they came for. Give them new insight on a topic.
In the end, you need to make this the BEST CONTENT that currently exists on the web for that topic.
Provide value and change their life.
Typically, this content is around 1,300 – 2,500+ words. However, this varies based on what you are writing about.
Your article will be read by thousands as you join our mission to Spark Bright Futures!
Understand the power and responsibility you have.
Step 4: Make the article conversational. Tell personal stories. No big paragraphs.
People like to relate to people NOT organizations or companies.
Therefore, don’t include BIG big paragraphs!
See this blog post?
Notice how I never write more than 4-lines in a paragraph.
Notice how easy this post is to follow and read.
Also, notice how I am having a conversation with you?
I am doing this for a reason.
When I talk about my personal life experiences and tie them back into the “keyword” or problem I am trying to solve, the user gets engaged… and my content gets shared more often!
Want to know a secret?
I have never been the best reader. When I was in school, I would almost ALWAYS mispronounce words.
I did everything I could never to be given the role of having to read in front of the class…
…because when I did, I would say the wrong thing and everyone would laugh at me!
I would get all sweaty, anxious, and scared.
The sad part…
I have not overcome this challenge. I still mispronounce words, misspell necessary words, and it embarrasses the heck out of me.
I used to be ashamed of this, primarily because I was the CEO of a nationally recognized tutoring & test prep company.
However, I learned by sharing this vulnerable story that I was able to connect with my readers more! I was no longer striving to be this “PERFECT PERSON.”
I was human.
Get vulnerable, share stories, and relate to the reader.
Those words may change their life… Let’s Spark Bright Futures!
Step 5: Include Multiple Forms of Content With Our Branding (At Least 3)
It is nearly impossible to keep people’s attention with just a mound of text!
Break it up so you can adhere to the visual, kinesthetic, and auditory learners.
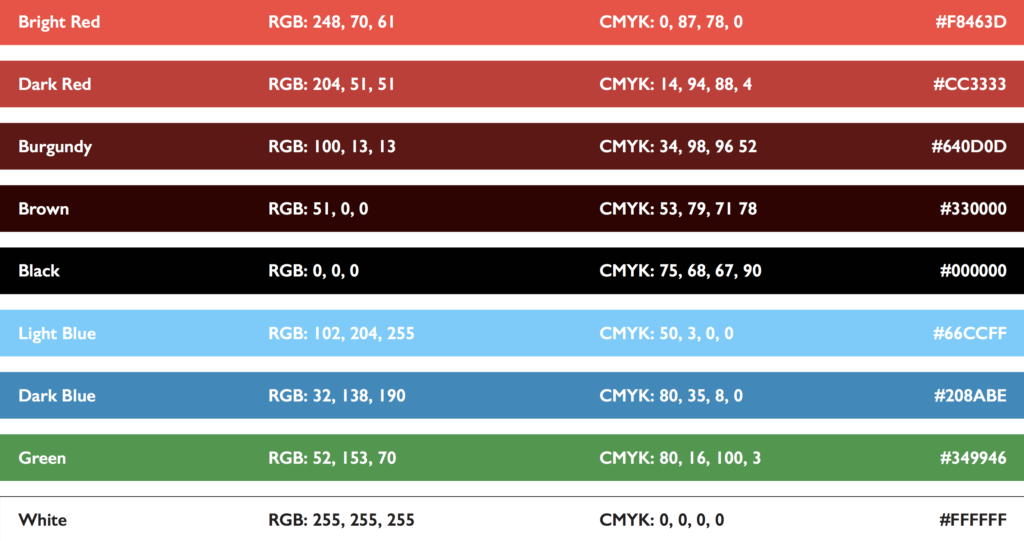
Make sure to include at least three different types of content and use our branding!
Non-Copywrited Images:
If what you are writing about can be explained using a non-copyrighted image you should include it!
Below I have listed a couple of different sites we use to find free non-copyrighted images.
Infographics
Infographics are a great way to help get your point across using data and visuals.
Vennage is a great tool we use to quickly create infographics to get our point across to the reader.
If done right, this should only take about 15 minutes to create an impactful graphics.
Quotes
Interview a couple of different people in the industry, or take a quote from an article they wrote about and link out to them.
“Quotes are a great way to break-up content and link out to related resources.” – Todd VanDuzer, CEO & Co-Founder of Student-Tutor
Videos
Find a video that relates to the content you are talking about, or create a video to help further solve the problem.
Screenshots & Gifs
Use screenshots or a free tool, like Giphy Capture, when you are trying to:
- Educate the user and provide the steps to get the desired outcome.
- Demonstrate how to use a product or service. (if you are reviewing a service or product that has a lot of keyword search volume)
You may have noticed how included a couple of screenshots & Gifs above to help educate you on the process.
Custom Created Images: (PERSONAL FAVORITE + MOST INCLUDE)
I am not 100% sure what category to place this in since it can be a mixture of all the above.
This is basically is a custom designed graphic to help further educate, demonstrate, inform, or entertain the user.
Use a free tool like Canva to create something as shown below.
Don’t worry, Canva is one of the most user-friendly tools to use!
If you need help, click here to watch this quick 3-minute video.
This image was from an article called “Cell Phones in School: 5 Reasons Why You Should Embrace It.”

Step 6: Add Internal & External Linking
Good blog-posts will help solve the user’s problem and direct them to other high-quality resources to further help them!
We require you link internally to at least 1-3 other of our blog posts and ONLY externally link to reputable websites with quality content that further helps the user.
For example, let’s say you are writing about career readiness tests for high school students.
- Linking out to a company that helps individuals with their careers is fine.
- Linking out to a company in Australia that owns a restaurant is not fine.
What is an internal link?
Let’s say you are writing about how to get into a UC college. Internally linking our UC Berkeley Article would work! (That link is linking to an internal page on our blog)
Step 7: Optimize the blog article for the keyword you are targeting
After you are done writing your blog article, go back through the article and integrate the keyword you are targeting.
Areas you want to integrate your keyword.
- Title
- Heading
- Subheadings
- Paragraph
- Conclusion
For example, let’s say your sub-heading was “It is Inevitable” and the keyword you where targeting was “Cell Phones in School.”
You could change the subheading to “Cell Phones in School are Inevitable.”
The goal here is to integrate the keyword in every possible location without sounding spammy.
Remember, you want to help Google understand what you are writing about.
Step 8: Proofread Your Article
This should go without saying, but please make sure you have proofread your article for spelling and grammar errors!
Also, this should also go without saying, but PLEASE read a couple of our blog articles to get a general idea of our blog’s writing style.
Step 9: Create a Featured Image
You are almost done!
Now all you need is a featured image that will be used to display your article.
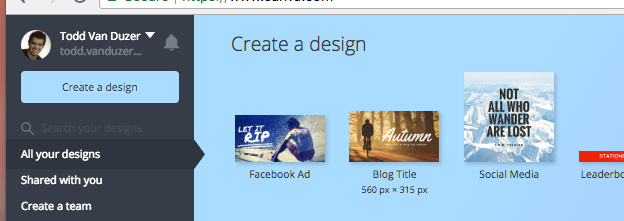
If you haven’t used the free design tool Canva yet… you will need to use it for this step.
Log into Canva and select: Create a Design > Blog Title.
Now, create a featured image that describes what your article is going for.
Please do not include too much text, and make sure to use the theme of our branding colors (shared in step 5).
Don’t worry, Canva is one of the most user-friendly tools to use!
If you need help, click here to watch this quick 3-minute video.
See examples all over our blog – we have created hundreds of images using Canva!
Step 10: Create a Facebook Featured Image
This is very similar to creating a featured image, the only difference is this one will be shown on Facebook and needs to have a different size.
As you can see above, Canva has a unique template for a Facebook Ad. Use this template to create your Facebook featured image!
Step 11: Create Folder & Share
If you followed all the above steps, there is usually no reason why we will not accept your guest blog post.
Now share it with us!
- Create a Google word document and name it “SUBMISSION – Last Name, First Name”
- Inside the Google word document include the following images and written text:
- Include the blog article with all images, videos, content, etc. & written text in a Google doc. On the top label the “topic'” you are targeting.
- Include the featured image & facebook image at the end of the article.
- Include a photo for your headshot at the end of the article.
- Include a 40-80 word bragging bio at the end of the article.
- Share the google doc with [email protected]
We will get back to you in 1-4 business days with any revisions or a published article!
If we don’t, please message us again. Maybe it went into our spam, accidentally missed it, etc.
We want to publish your article if you followed the steps so, please be persistent!
In Conclusion
The above 11 steps may seem intimidating at first.
However, you will find it doesn’t take that long to complete if you attack the following steps now! 🙂
- Focus on your topic/keyword & follow the tips we provided!
- Create a good outline & title
- Solve the user’s problem
- Make the article conversational. Tell personal stories. No big paragraphs.
- Include multiple forms of content with our branding (At least 3)
- Add internal & external linking
- Optimize the blog article for the keyword you are targeting
- Proofread your article
- Create a featured image
- Create a featured Facebook image
- Create a folder & share
Follow the following 11-steps, and your article could be featured on a platform that gets over a million page views every year!
PS: Impress us, and we might even ask you to become an ongoing contributor, gain login access, and the ability to write and publish posts whenever you like!
Questions? Ask us via Facebook messenger or send us an email to [email protected]
Todd VanDuzer
Latest posts by Todd VanDuzer (see all)
- Why Finding the Right Thing to Study Matters: Setting the Foundation for Success - July 26, 2023
- How USA Staff Onboarding Benefits From Innovative Software - July 26, 2023
- Top 7 Best Reasons to Get an MBA - June 7, 2023
- How to Support Your Child When They Go to College - April 29, 2023
- How to Maximize Your Job Search with Expert Resume Writers Experienced in Your Field - April 20, 2023